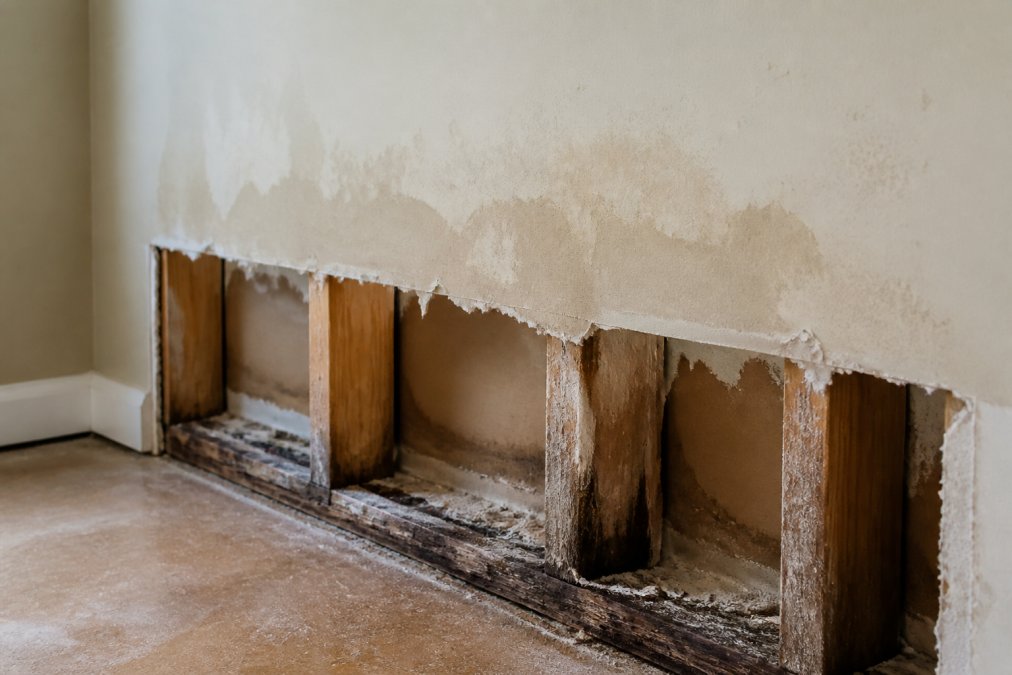
 how-to
How to Fix Water Damaged Drywall in 7 Steps
Table of Contents
- Signs of Water Damage in Drywall
- Drywall Repair Tools List for Water Damage
- Safety First: Protective Gear and Shutting Off the Water
- Drywall Drying Time After a Leak: How Long to Wait
- Signs of Mold Behind Drywall: What to Look For
- Step-by-Step: How to Fix Water Damaged Drywall
- When to Call a Professional for Water Damaged Drywall
- Frequently Asked Questions
Last Updated: September 24, 2026
Signs of Water Damage in Drywall
Water damaged drywall rarely announces itself with a dramatic collapse. Most homeowners discover it weeks after the leak started, when a brown ring appears or a wall feels soft. Spotting the signs early can mean the difference between a small patch and a full wall replacement.
Here's what to look for:
- Brown or yellow stains on ceilings and walls
- Soft or spongy spots when you press the surface
- A musty, earthy smell that won't go away
- Paint that bubbles or peels without obvious cause
- Visible cracks near seams or corners
Stains, Soft Spots, and Musty Odors
A stain means water has soaked through the drywall paper into the gypsum core. Soft spots mean the board has lost its strength. A musty odor usually points to mold behind the surface.
Drywall Repair Tools List for Water Damage
Having the right tools on hand saves mid-repair trips to the hardware store. Most of what you need is affordable and reusable.
Must-Have Tools and Materials
| Tool or Material | What It's For |
|---|---|
| Utility knife | Cutting out damaged sections |
| Drywall saw | Clean cuts around edges |
| Stud finder | Locating framing behind the wall |
| Moisture meter | Checking water content in the board |
| Taping knife | Spreading joint compound |
| Sanding block and fine-grit sandpaper | Smoothing patches |
| Drywall tape | Reinforcing seams |
| Joint compound | Filling and blending patches |
| Drywall screws | Securing new board |
| Stain-blocking primer | Sealing stains before paint |
You'll also want a dehumidifier, safety goggles, and a respirator. These aren't optional, they protect your lungs and help the repair last.
Safety First: Protective Gear and Shutting Off the Water
No repair should start until the water source is completely stopped. Fix the leak, shut off the supply line, or call a plumber first. Patching over an active leak just delays the same problem.
Wear the right gear before you cut anything:
- Safety goggles to keep dust and debris out of your eyes
- Respirator or N95 mask for mold spores and drywall dust
- Work gloves to protect against sharp edges
- Old clothes you don't mind ruining
Drywall Drying Time After a Leak: How Long to Wait
Drywall drying time after a leak depends on how wet the board got, how much of the cavity was affected, and how aggressively you move air. A lightly damp surface may dry in a couple of days. Saturated drywall can take a week or longer, and some sections never dry fully because the paper facing traps moisture against the gypsum core.
Using a Moisture Meter the Right Way
A pin-type moisture meter takes the guesswork out of this step. Press the pins into the drywall and read the moisture content as a percentage. The number only means something compared to a baseline, so take a reading on a known-dry section of the same wall first.
A practical workflow:
- Establish a baseline. Take three readings on dry drywall in the same room and average them.
- Map the wet zone. Take readings in a grid across the damaged area and about 12 inches past the visible stain in every direction.
- Mark the boundary. Note where readings return to baseline. That line, not the stain, defines how much drywall comes out.
- Recheck daily. Take the same readings at the same points each day and write them down. A number that is not falling is a board that is not drying.
- Cut when it plateaus. If readings stop dropping over a 24-hour period while the dehumidifier is running, the moisture is trapped and the section should be removed.
Running a Dehumidifier and Fans Effectively
Run a dehumidifier in the closed room and empty it regularly, paired with box fans to keep air moving across the surface. This pulls moisture out faster than either tool alone, but placement matters.
- Close the room. A dehumidifier working against an open house pulls moisture from everywhere and dries the wall slowly.
- Aim fans across the wall, not at it. Air moving parallel to the surface strips moisture off the face; air blowing straight in pushes it back.
- Keep the room warm. Moisture moves from the wall into warm air more readily than into cold air.
- Dump the reservoir often. A full tank stops dehumidifying, and a unit that shuts off overnight undoes a day of progress.
Treat the moisture meter as the decision-maker, not the calendar. The 48-to-72-hour window is a starting point for drying, but the reading is what tells you whether the drywall stays or goes.
When Drying Is Not Enough
Some situations will not dry out no matter how long you run equipment. Cut the drywall out if any of these are true:
- The board is soft, crumbly, or sagging
- The leak was a category 2 or category 3 water loss (gray or black water), which requires removal regardless of how it reads
- The drywall is the paper-faced type and the leak ran inside the wall cavity
- Mold is visible or the musty odor persists after drying
- The same spot has been wet more than once
Signs of Mold Behind Drywall: What to Look For
Mold behind drywall usually shows up as a musty smell, dark discoloration near seams, or repeated paint peeling in the same spot. If you see any of these, assume moisture is still present until proven otherwise.
Watch for these specific signs:
- A persistent musty odor in one room
- Black, green, or gray speckling near baseboards
- Warping or bubbling that returns after painting
- Allergy symptoms that worsen in a specific room
Surface Mold vs. Hidden Mold
Surface mold sits on the face of the drywall and wipes away with a damp cloth and mild detergent. Hidden mold grows on the back of the board or inside the wall cavity, out of sight.
Step-by-Step: How to Fix Water Damaged Drywall
Here's the full repair process, from cutting out the damage to matching the texture so the patch disappears. The steps below assume the leak is stopped and the area has been dried or assessed with a moisture meter.
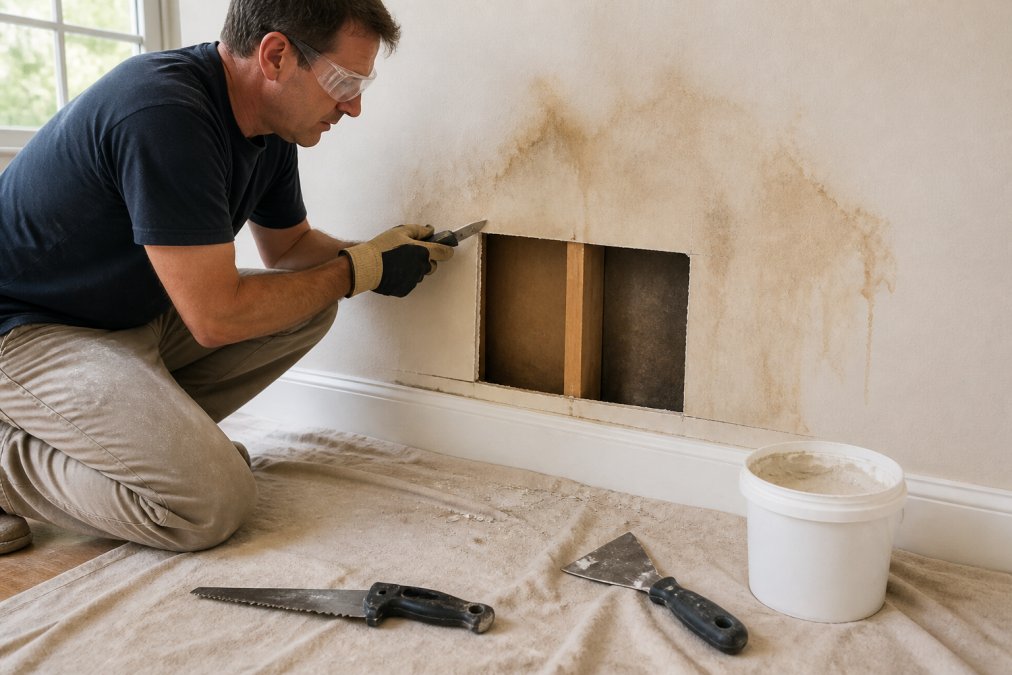
Cutting Out the Damage and Patching
- Mark the damaged area with a pencil, extending at least 2 inches past any staining or soft spots.
- Score the outline with a utility knife, then cut through with a drywall saw.
- Remove the damaged piece and check the cavity behind it for moisture, mold, and insulation damage.
- Cut a new patch from drywall of the same thickness, sized to fit the opening.
- Secure the patch with drywall screws into the studs, spacing them about 6 inches apart.
Inspecting Insulation Behind the Drywall
This is the step most guides skip, and it decides whether your repair lasts. Once the damaged drywall is out, inspect the cavity.
- Fiberglass batts that are wet or compressed should be removed and replaced. Wet fiberglass loses its loft, and compressed insulation does not perform. It also holds moisture against the framing.
- Blown-in or loose-fill insulation that has been soaked is usually a loss. It mats down, and you cannot reliably dry it in place.
- Foam board and closed-cell spray foam are far more forgiving. Closed-cell foam does not absorb water, so it can often stay if the surface is cleaned and dried.
- Cellulose insulation is the worst case. It wicks and holds water, and wet cellulose against wood framing is a recipe for rot and mold.
Wet insulation is not just a mold problem. Soaked cellulose and some foam products can degrade, and any electrical wiring or a recessed light fixture sitting in a wet cavity is a shock and fire risk. If you see wet insulation around wiring or a fixture, stop and have an electrician look at it before you close the wall.
Checking Studs and Joists for Structural Damage
Drywall is the easy part. The framing behind it holds the house up, and water that reached the drywall usually reached the wood too.
What to look for:
- Soft or punky wood that gives under a screwdriver tip
- Dark staining or white, thread-like growth on the framing
- Warping, twisting, or a visible bow in a stud or joist
- Sagging in a ceiling joist, which is a serious sign
- Crumbling or powdery wood near the base of a stud
Applying Joint Compound and Texture Matching
Apply joint compound over the seams and embed drywall tape while it's still wet. Let it dry, then add two or three thin coats, feathering the edges wider each time. Sand lightly between coats with fine-grit sandpaper.
Photograph your ceiling texture in good lighting before you start the repair. Matching a pattern from a photo is far easier than trying to remember it while standing on a ladder. Take the photo from the same angle a person would view the ceiling from below.
Priming and Painting the Patch
Let the final coat of compound dry completely, then sand it smooth and wipe off the dust. Prime the patch and any stained area with a stain-blocking primer, shellac- or oil-based is the reliable choice for water stains, since water-based primers often let tannins bleed back through.
When to Call a Professional for Water Damaged Drywall
Call a professional when the damage covers more than a small patch, when mold is visible or suspected behind the wall, or when the leak has affected structural framing. These situations need more than a cosmetic fix.
Other signs it's time to bring in help:
- The water source can't be found or stopped
- The damage spans multiple rooms or a large ceiling area
- You see sagging, bowing, or cracks in the framing
- You're preparing a home for sale and need it done right the first time
Frequently Asked Questions
Can water damaged drywall be saved?
It depends on the extent. If the drywall is only slightly damp and dries within 24 to 48 hours, it may be salvageable. But if it's soft, crumbly, or shows mold, you'll need to cut out and replace the damaged section. In many cases, replacing the drywall is more reliable than trying to dry it out, especially if water damage has compromised its structure. Always check for hidden moisture with a moisture meter before deciding.
What does water damage behind drywall look like?
Look for discolored stains, bubbling paint, soft spots, or a musty odor. You might also see visible mold growth or feel dampness when touching the wall. In some cases, the drywall may feel spongy or sound hollow when tapped. If you suspect hidden damage, use a moisture meter to check for elevated moisture content. Catching these signs early can prevent mold and structural issues.
How long does it take wet drywall to dry out?
Most drywall dries within 24 to 48 hours if the area is well-ventilated and a dehumidifier is used. However, thick or multiple layers may take longer. If the drywall was soaked from a major leak, it could take several days. Always verify with a moisture meter; if readings remain high after 48 hours, the drywall may need replacement. Never paint or patch until the moisture content is below 15%.
When should you call a professional for drywall water damage?
Call a professional if the damage covers a large area, if you suspect mold behind the walls, or if the drywall is sagging or structurally compromised. Also, if you've tried drying it out but moisture persists, or if you're uncomfortable with tools like a drywall saw. The Drywall Expert offers free estimates and can assess the damage, handle repairs, and ensure proper drying.
Water damage never stays contained on its own. The longer moisture sits behind the drywall, the more it spreads into insulation, framing, and ceilings. If you're facing a repair that's bigger than a simple patch, or you want it matched so no one can tell it happened, The Drywall Expert offers free estimates, senior and military discounts, and a team that cleans up before it leaves. Get a free quote from The Drywall Expert and get your walls back to looking new.